Nov 3, 2012

Wind 'N Go Crank LED Lantern

This post was originally submitted from my phone during Superstorm Sandy. Before the storm I ordered a bunch of hand crank lights because I always forget to get new batteries before I need them. Luckily I didn't lose power but I have some family nearby that did. These hand crank lanterns helped them find their way around their home for over a week without power.

Very impressive considering how affordable they are. See the quick review I posted and video from my phone demonstrating the hand crank lanters.

I ordered these Wind 'N Go Mini LED Lantern before hurricane Sandy but they didn't arrive until today. They provide a decent amount of light and you  don't need to worry about batteries or power. One minute of cranking provides up to an hour of light. It's enough light to read by if close and can help you find your way around a small bedroom. The lantern has a total of four LEDs but can be run with only two. Pressing the button once turns on two LEDs. Pressing the button again will turn on all four. With all four LEDs on the lantern will only run thirty minutes from one minute of cranking. The Wind 'N Go Lantern can also be charged with an optional AC adapter. Five hours of charging will provide six hours of light using two LEDs or three hours using all four.  An optional cell phone charger can also be purchased to get one or two minutes of talk time from one minute of cranking. Wind 'N Go Mini LED Lantern


Oct 12, 2012

How To Remove Broken Sprinkler Risers

Broken Spinkler Riser
The cut-off riser I used when mounting I replaced my impact  sprinkler on a spike base with a rotor sprinkler broke when I was re-positioning the sprinkler and I couldn't get it out. Luckily I found a tool designed to remove broken sprinkler risers and nipples.

The Orbit Nipple Extractor removed the broken cut-off riser portion that was stuck in the hose-end spike base effortlessly.

I previously tried all sorts of tools and methods including plyers, knives and saws to try and remove the threaded portion with no luck. I even wound up cutting one of my fingers pretty badly in the process. The nipple extractor took it out within a few seconds. Once again right tool/right job and things go smoothly.

The Orbit Nipple Extractor costs about as much as a replacement hose-end spike base and I had contemplated just purchasing a new spike base rather than trying to get the broken riser out of it. In the end I decided it would be a good idea to have the nipple extractor in case I ever need it in the future. I decided to stick with the plastic cut-off risers which are designed to break before other components because it's easier/cheaper to replace a riser than it is to replace a sprinkler body or pipe fitting. In the future I might also install a full, in-ground sprinkler system and this tool would be nice to have in case anything goes wrong.

1/2" and 3/4" Orbit Nipple Extractor
The version of the nipple extractor I purchased comes with 2 removable reamers that are used to remove plastic threaded components that have broken while still screwed into their mating pieces. One is for 1/2" risers while the other is for 3/4". Simply choose the appropriate reamer and screw it onto the T-shaped handle. Keep in mind that the reamer is threaded in the opposite direction. It's righty-loosey/lefty-tighty and not righty-tighty/lefty-loosey.

Once you insert the nipple extractor into the broken nipple, press down and slowly turn the handle counter clockwise. The fins of the nipple extractor should dig into the plastic of the riser or nipple creating enough friction to begin unscrewing the riser out of the fitting.

Nipple extractor removing broken riser from sprinkler base.


I had no idea such a tool even existed. I happened to run across the Orbit Nipple Extractor while searching for something else. If only I found it sooner I could have saved myself a couple hours trying in vain to use other means and saved myself the pain and inconvenience of cutting my index finger. I highly recommend anyone that owns a sprinkler system to pick up one of these.

Sep 28, 2012

Reader Question: Lawn Renovation

Reader Manny wrote in with some questions concerning my recent organic lawn renovation project.

Question

Hi,

I am enjoying your blog. Thank you for sharing so much detail. I have some questions. Did you consider verticutting your existing lawn and overseeding, rather than killing your lawn and starting from scratch? It seems that your goal was to amend the soil and this would be achieved by starting anew.

It is now September 24, 2012 and I live in Pittsburgh. I had a late start. I am concerned about the grass getting established well enough before the first frost. Did you have the same concerns when beginning your project?

Regarding your choice of seed...did you consider Pearl's Premium? I noticed that both Black Beauty and Pearl's Premium Sunny both have Dakota Tall Fescue. Pearl's is marketed as needing infrequent watering and mowing i.e. once per 3 to 4 weeks. Black Beauty is not promoted as such, but I am wondering if it does have these qualities. I am wondering which grass seed in the Pearl's blend gives these infrequent watering and mowing qualities.

Answer

Manny thank you for taking the time to ask a question and for your kind words on my site. It's always great to get feedback!

Verticutting

I didn't consider verticutting for a number of reasons. First I'm only doing a small area and I didn't want to deal with the hassle of going out and renting bulky equipment.

Second, and probably most importantly, one of my main motivations for doing a lawn renovation was was to substantially change the appearance of my lawn. In particular I was looking for a lawn that was a much darker green than my previous lawn. That's why I went with Jonathan Green lack Beauty grass seed.

Overseeding the old grass with the new grass wouldn't give me that deep, dark look I wanted. I had also overseeded a few times in the past. While it did improve the lawn it didn't change the overall qualities dramatically. Starting over almost completely from scratch seemed to be the best route for me.

Verticutting is better than just spreading grass seed over an existing lawn but I think if you dethatch or core aerate at the same time as seeding you'll get results that aren't too far off from verticutting. It still takes at least 2-3 years of overseeding to significantly have the new grass dominate the old.

Amending the soil wasn't my main factor. In fact as I mentioned in that soil amendment update I didn't even plan to do as much work to the soil as I actually did. My plan was to top dress with a little compost, work the compost into the top inch of existing soil, seed then top dress with more compost.

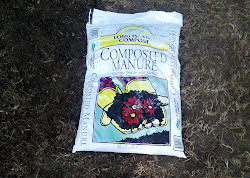
The composted manure I used was very wet and clumpy and impossible to topdress which meant I needed to do a lot more to get it integrated into the soil. Disturbing the soil like that brings up weed seeds, which I'll have to deal with next spring.

Lawn Seeding Dates

I was concerned about the timing but seeding through September in my area is fine. We're in similar climates but if I were you I would check out the website or contact your local Cooperative Extension Office and see what they recommend.

Pearl's Premium Seed

I had seen Pearl's Premium Grass Seed when I was looking into Dakota Tall Fescue as well but I wanted to use a grass seed that was all Tall Fescue, such as Black Beauty, so I can get a more consistent look. Getting a dark green lawn was also important and the pictures I saw of Black Beauty seemed to have a darker color than Pearl's.

My seed choice came down to Jonathan Green Black Beauty or a custom seed mix. One of the reasons I went with Black Beauty was that it was available at my local garden center. I haven't run across Pearl's anywhere.

Pearl's Premium is a mix of Dakota Tall Fescue, Frontier Perenial Ryegrass, Deepblue Kentucky Bluegrass, Harpoon Hard Fescue and Carmen Chewings Fescue. The last two seeds are fine fescues. Fine fescues are frequently used in low maintenance situations such as the sides of highways. Dakota Tall fescue doesn't seem to be that fast growing compared to other grasses. Perenial Ryegrass and KBG in general require more maintenance. I haven't looked into each variety in depth but I did recognize some of the seeds as ones used or created by Jonathan Green or their seed grower.

Black Beauty is advertised as a grass that requires less maintenance as far as watering is concerned and Turf Type Tall Fescues generally require 3lbs of Nitrogen per 1,000 sq ft as opposed to 4lbs for KBG. I don't know if it's the type of lawn that can go weeks without mowing though. I have seen a tall fescue lawn that doesn't get mowed frequently and it doesn't look good to me.

Sep 16, 2012

Organic Lawn Renovation - Soil Prep and Seeding

LI Compost Composted Manure in soil Before and After
Days 9, 10 and 11 of my organic lawn renovation project were pretty tough. A lot of raking, digging and incorporating compost. I ran into some snags that made it even more difficult but hopefully it will all be worth it when my new lawn comes in.

I was expecting to have seed down by the 10th day but I ran into a few snags. I had the bright idea to do all the work with manual tools since it was only 600 sq ft that I was renovating but it wound up being more tiring than I expected.  This post is a few days late as a result. My whole body was sore and my fingers were too tired to type. It was a pretty good workout though. :)

The first major step was to kill off as much of the existing lawn as I could using two organic herbicides instead of RoundUP. (See BurnOut II vs Nature's Avenger.) That went pretty well and both killed a large majority of the existing grass and weeds. There was some weedy looking tall fescue that was coming back too fast and I decided to dig it up before I went on to amending the soil, leveling the lawn and seeding. Details discussed below.

Aug 31, 2012

Organic Lawn Renovation: BurnOut II VS Nature's Avenger

Today is the first day of my organic lawn renovation project and it starts off with killing off my existing lawn and weeds. I didn't want to use RoundUp or other glyphosate based herbicides so it seemed like a good opportunity to compare two of the available organic weed and grass killers I mentioned in my post on organic RoundUp alternatives to see how well they work.

I reached out to St Gabriel Organics and Cutting Edge Formulations, the makers of two organic herbicides which I had been investigating, who provided me free samples for my review.

As I posted previously, there are three sections of the lawn I'm renovating and will apply BurnOut II to half of each section and Nature's Avenger to the other half.

This is a multi-day process so bookmark this post as I'll be updating it with the results. I'll also be tweeting when I update this post so please follow me on Twitter.

Smith 2 Gallon Max Contractor Sprayer Review

Smith 2 Gallon Pump Sprayer
I needed a new pump sprayer for my lawn renovation project and the  Smith 2-Gallon Contractor Sprayer seemed to be the best garden sprayer available and at a reasonable price.

I used to own a Stanley metal pump sprayer that lasted for over a decade until the nozzle got clogged and I couldn't clean it. I was shopping around for a replacement nozzle and was about to order one when I realized I can't find my old sprayer! Don't know what might have happened to it. It's not like it's a sock.

While looking around for replacement parts I kept seeing the Smith pump sprayer and it had very good reviews and a well thought out design so I decided to purchase it.

Smith 2 Gallon Contractor Sprayer
The image on Amazon (where I ordered it) was slightly different than the sprayer I received. It seems that they have made some upgrades and re-branded it as a "Contractor Sprayer" instead of a "MAX Contractor Sprayer".

Aug 30, 2012

Organic Lawn Renovation: The Plan

Poor lawn with lots of weeds
Because I was planning on killing and reseeding parts of my lawn last year I didn't take as good care of those areas as I should have. I didn't do anything about the weeds and didn't water regularly. As a result the lawn in one section in particular has gotten very bad and it wasn't great to begin with.

Three sections will be renovated in total. Two are in decent shape but one of the sections requires a bit of regrading and I might as well reseed the other since they're in close proximity and I feel the grass should match.

Aug 14, 2012

Reader Question: Converting To Organic

Linda asks:

I think I need to add something to the lawn to help dethatch naturally.and maybe help the soil.  Would spreading a commercial packaged manure mixture be helpful?  At 98 cents a bag I could cover the lawn with 30 bags.

Also would you suggest an application of ammonia sulfate in the Fall to help balance the ph from years of chemicals?

thanks! ;-)

There are a few different questions here and I'll answer them one at a time. This is general advice when converting to organic lawn care.

Naturally Dethatching

First, thatch isn't a bad thing to have in your lawn. It's when you have more than a 1/2" of thatch that it can be a problem. Take a spade or shovel and cut out a square of your lawn to inspect the profile and measure the thatch layer. If it's more than 1/2" then you'll want to do something about it.

The problem with thatch is that it can prevent air, water and nutrients from going down into the roots. There are two ways to resolve this problem. One is to mechanically dethatch, the other is to core aerate. I discussed aerating vs dethatching previously. Basically dethatching removes the thatch layer and aerating creates holes in the lawn that allow air, water, etc to penetrate into the root zone.

Soil microbes and other organisms in your soil such as earthworms will help break down the thatch but lawns that have had years of synthetic fertilizers and pesticides applied will have poor soil biology and likely soil compaction. Adding compost to the lawn will improve the soil biology as well as add organic matter in the soil.

Adding Compost

Compost does a lot of great things to the lawn. It improves the soil structure, adds organic matter, helps relieve compaction, adds nutrients and enhances soil biology. It is the best thing you can add to your soil when converting from synthetics to organics. Some microbes found in soil and compost help break down the chemicals in the lawn from synthetic fertilizers and pesticides.

The EPA has published this information sheet on compost describing it's use for bioremediation, disease control and other issues. Compost was even effective in remediating soil that had explosives in it!

From what I've learned it's best to use a mix of compost from different sources. Compost from plant material and composted manure. I would personally go heavier with the plant based compost because if the composted manure is not composted completely it can cause problems.

30 bags of compost at I'm assuming 2 cubic feet per bag is 60 cu ft is over 2 yards. I think you'll be better off having that compost delivered in bulk. Find a local source of plant based compost that will deliver. Lay a tarp on your driveway for them to deposit it on so it doesn't create a mess. I haven't used one but I've been thinking a Bagster Dumpster in a Bag might be good to use. Buy a few bags of composted manure and mix it in. A pitch fork works well but you can do it with a shovel too.

If you don't have a wheelbarrow, borrow, rent or buy one to help you distribute the compost and use a rake to spread it in. The Ames True Temper Kodiak Forged Level Head Rake is a good rake for this purpose.

To figure out how much compost you'll need determine the square feet of your lawn area and how many inches of compost you'd like to apply. Use the following formula.

(square ft of lawn) X (inches of compost) / 12 / 27 = Yards of compost.

If you had 5000 sq ft of lawn area and you wanted to apply 1/2" of compost it would be:

5000 X .5 / 12 / 27 = 7.7 cubic yards of compost.

It's roughly 3/4 of a yard of compost per 1000 sq ft for every 1/4" of compost you want to apply.

To determine the square footage of your lawn you can use the property survey that's likely attached to your mortgage (or you can get it from your local tax assessor I think) and use that as a guide. You can even try downloading Google Earth and using the satellite images and measuring tools to measure your lawn but going out and taking direct measurements would be the best.

Soil PH

I wouldn't add anything to the soil to adjust the pH unless I knew what the pH was. Don't guess. Send a sample of your soil to get tested by your local university cooperative extension for analysis and use that information to adjust the pH of your soil. Most likely you'll need to add lime.

The soil report you receive will give you recommendations on nutrients in your soil but will most likely recommend synthetic fertilizer applications. You can use organics instead but will need to calculate how much fertilizer to apply. For example if they tell you your soil needs 1.5 lbs of potassium per 1,000 sq ft then you need to figure out how much of your organic fertilizer to apply to give you 1.5 lbs per 1k sq ft.

What I Would Do If I Were You

Right now is the best time to start the process.

1. Determine your soil pH either by sending a soil sample to your extension office or by using a consumer soil pH tester like the Luster Leaf Rapitest Mini Soil pH/Moisture Tester. If you use the soil tester it's important that the soil is moist to get an accurate reading and you should test different locations and take an average.

2. If you have more than 1/2" of thatch I would dethatch the lawn. I don't have a large lawn so I use a manual dethatcher that also helps remove ground ivy and gives a good workout. :) If you have a larger area rent a gas powered dethatcher.

3. Whether you dethatch or not I would core aerate the lawn. Again, I have a small lawn and like to sweat so I use a Turf Hound manual aerator. Based on how much compost you're thinking of getting I assume you'd want to rent a core aerator. Many rental places will carry them. Make sure it's a core aerator and not a spike aerator. You'll want to run the aerator over your lawn multiple times in different directions. How many times you go over your lawn will depend on your model. You want to get at least 9 holes per sq ft but as many as 20 holes per square foot if your soil is very compacted or heavy clay. I'd shoot for at least 16. Leave the plugs on your lawn, don't rake them up.

4. Apply lime and organic fertilizer as needed. I've had good results with Espoma Bio-Tone Organic Starter Fertilizer. It has a good ratio of nutrients and contains beneficial microbes. Do not use corn gluten meal at this point if you plan on overseeding which I would.

5. Spread compost on your lawn. Get bulk compost delivered. If you can get a mix of composted plant material and composted manure that's your best bet. If not get the composted plant material and mix in some composted manure. Plain composted plant material is fine too. Because of the core aerating I would shoot for 1/2" of compost.

6. Spread a good quality grass seed over the lawn and water it as recommended to get good germination.

Starting next Spring use organic lawn fertilizers 3-4 times a year. Corn gluten meal in the early spring and late summer, Ringer Lawn Restore in late spring and mid fall would be a good star. Also using a pump sprayer (I like the Smith 2-Gallon Max Contractor Sprayer)  to apply soluable kelp and humic acid in late spring and a one or two times during the summer would be great. You can mix the kelp and humic acid and apply them at the same time.

Also read my mowing tips for a healthier lawn.

Hope this helps!

Aug 13, 2012

Jonathan Green Black Beauty Time Lapse Video

Jonathan Green Black Beauty grass
I tried to grow two containers of grass indoors. The first was Jonathan Green Dense Shade grass seed which I was hoping would do well with the limited light on my desk. The second was Jonathan Green Black Beauty grass seed mix that I'm considering using if I do a lawn renovation. I had both containers sitting on my desk and created a time lapse video of the Black Beauty Grass seed germinating as well as some of the Dense Shade I replanted because the old seed I used didn't germinate very well.

The video covers 15 days starting from the 2nd day of planting the Black Beauty grass seed.

I was surprised that Black Beauty appeared to do better in these low light conditions compared to the Dense Shade mix but the Dense Shade also had a number of issues going against it.


Black Beauty is on the left and Dense Shade on the right. Under these conditions where I could easily keep the soil moist and no direct sun was hitting the seeds to dry them out the seeds started to germinate very quickly. I used a homemade guide and a pair of scissors to cut the grass evenly a few times during the video.

I used to move the Dense Shade container onto a sunny window sill every couple of days so it could get some direct sunlight. After starting the time lapse video I had to keep the container in the same spot (more or less). At some point I started using a small desk to illuminate part of the containers to give the video a more even appearance. The side of the Dense Shade container that had direct light on it 24 hours a day from a very low wattage desk lamp did much better than the other side of the container that only had some indirect sunlight through North facing windows. The Black Beauty container on the other hand did well all over.

There were a few things going against the Dense Shade mix. First I used grass seed that was over 2 years old that gave me poor germination. Second, the potting mix was infested with fungus gnats. I used neem oil to kill them but I saw the larvae crawling around in the video a few times.

The Black Beauty didn't seem to have the same issues with the fungus gnats or at least not as bad. In the video it looks like there might have been some but the grass had grown in very thick and it was hard to see the potting mix. I did see some fungus gnats landing on the blades of grass but they may have come from the other container.

Black Beauty, as some other TTTF grass varieties are infected with endophytes (a beneficial fungus) that helps control insects. That might be the reason that there wasn't a problem but another reason might be because I didn't plant them both at the same time. I used Jungle Growth's Organic Potting Mix and I've seen other complaints about fungus gnat infestation but from what I also read this is a problem with many different potting mixes. I planted the Dense Shade as soon as I opened the bag of potting mix while it was still moist. Black Beauty on the other hand was planted weeks later and I had already filled the container with the potting mix. During those weeks the mix had dried out. This might have killed off any eggs or larvae in that container.

I chose to plant the grass in a container because it was the middle of summer and way too hot to plant the grass outdoors in a test plot and I wanted to get at least some sense of what Black Beauty might look like. So far it seems like a pretty decent grass mix with very good germination and nice color. It's also a little cheaper and more readily available than what some consider elite grass seed.

You can also read more of my thoughts on Black Beauty as well as why I'm considering Turft-Type Tall Fescue instead of Kentucky Bluegrass..

Aug 4, 2012

Ryobi 40V Cordless Blower Review

Ryobi 40V Cordless Leaf Blower
The leaf blower, an odd name considering I hardly ever use it to blow leaves. It's the last tool used after edging, mowing and trimming my lawn. Until recently it was my least favorite part lawn care because I used an old corded blower. The last few weeks however I've been using a Ryobi 40V Cordless Leaf Blower which has made cleaning up after mowing is a lot easier than it used to be.

Sometimes I was lazy and leave the clippings alone and let the wind and rain eventually take care of them. This left the property looking unkempt for a couple of days but the cordless blower is such a joy to use I don't think I'll ever have that problem again.

Included in my review of the Ryobi 40V Blower is a video demonstrating how well it works in different applications.

Jul 28, 2012

What is Elite Grass Seed?

Elite Grass Seed
If you're searching the web for the best grass seed to plant in your lawn you undoubtedly came across references to elite grass in lawn and gardening forums, marketing and even university turf trial documents.

 It seems like people are giving a lot of weight to this term and it almost seems as if you don't use elite seed while renovating your lawn your lawn won't be as nice, it will have tons of problems, your neighbors will hate you and your kids won't get into a good school. Might as well save money and just plant hay if you're not using elite grass seed. So let's go out and buy a bag of elite grass seed so we don't ruin little Johnny's future! But what makes one grass seed elite and another not elite?

Jul 23, 2012

Mowing My Black Beauty Desk Lawn

Jonathan Green Black Beauty
As you can see the Jonathan Green Black Beauty Grass I'm growing indoors in a container had gotten over 3" tall and was starting to look a bit ragged so I thought today would be a good time to trim my indoor lawn.

Obviously I can't use my lawn mower so I needed to come up with another way to get a nice, even, level cut for my indoor lawn.

I created a cutting guide and I'm using a pair of scissors to mow my indoor grass. I'll describe how I made the mowing guide and how I used it below.

Jul 22, 2012

Grass Indoors: Black Beauty Vs Dense Shade

Top View of Jonathan Green Black Beauty and Dense Shade grass in a container
It's been 25 days since I planted the Jonathan Green Dense Shade and 9 days since I planted the Jonathan Green Black Beauty grass seeds in containers indoors. The Black Beauty is doing much better than the Dense Shade as can be seen from the photo on the left. Black Beauty is on top.

The Black Beauty stand almost reminds me of the decorative wheatgrass that is more commonly grown indoors.

The Dense Shade had a lot going against it. First I used seed that was a few years old but I did manage to get pretty good germination by putting a lot more seed down than recommended. There were some thin spots and I added more seed as well as more potting mix to raise the level of the soil because it had compressed a bit after watering. Over the past few days the new seeds have begun sprouting.

Next, I noticed an infestation of bugs in the Dense Shade container. After doing some research I determined they were likely fungus gnats. You can see a cool video of neem oil killing the fungus gnats and their larvae. The bugs appear to have stunted the growth of the grass. The new seeds are doing well but if the old grass doesn't recover it's just not going to look good.

The Black Beauty grass has been doing much better although when the Dense Shade was 10 days old it was looking pretty good too. I used fresh seed for the Black Beauty and it germinated a lot better and I have good coverage with no bare spots unlike Dense Shade. There are still Black Beauty seeds germinating.

The grass is also standing upright while the Dense Shade has slumped over. The Black Beauty is about 3" tall. In a couple of days I'm going to have to give it it's first mowing.

Both containers are getting some indirect light from north facing windows plus some additional light from the room lights. That seems to be enough. So far Black Beauty appears to be more shade tolerant than I thought.

Jonathan Green Claims Black Beauty contains endophytes which help make it more insect resistant. When I noticed the fungus gnats infesting the Dense Shade container I didn't see any in the Black Beauty container but I don't know for sure if the endophytes were the reason why.

The main reason I started the Black Beauty was to see how thick the blades get. Right now the blades still have a very fine texture but I can see they're begging to get a little wider. So far it's looking like it might be a good choice for my lawn renovation.

Here's a top view of both grass containers. Black Beauty is on the right, Dense Shade is on the left.

Jul 19, 2012

Growing Grass Indoors: Bugs/Neem

Jonathan Green Black Beauty grass growing in a container
A quick update on the two grasses I'm growing indoors in containers. One's doing well, ran into a problem with bugs in the other used neem oil to kill them. Happened to catch it all on video which is included further down.

The picture on the left is the Jonathan Green Black Beauty at Day 6. It has germinated very well and some shoots are still popping up. Average blade length seems to be about an inch with some about 1/4" and half a dozen or so that have grown about 2" long.

Black Beauty displays significantly more phototropism compared to the Jonathan Green Dense Shade I have growing next to it. During the day the Black Beauty blades are pointing towards the window. After the sun starts to go down I turn on the room light so it can get a little more light and the blades start to stand upright fairly quickly. I'll be able to demonstrate this a little better in a few days.

So far it's looking pretty healthy. Germination was a lot better and more even than the Dense Shade and that's most likely due to the age of the Dense Shade. It was an old bag that was 3 years old. I should have taken the time to buy a new bag.

These are pretty ideal conditions for the lawn other than sunlight. Temperature controlled environment, good pH, growing medium rich in organic material, ability to keep the seeds moist throughout the day.  The grass is getting some indirect sun from a couple of North facing windows and I supplement that with some artificial light from time to time.

From the top it doesn't look as impressive yet but you can see how even the germination was.

Top View of grass in a container

In a week or so I think it will fill in much better. From the side it's already looking pretty good.

The Dense Shade on the other hand hasn't been fairing so well on Day 22. On Day 17 it was looking decent except for some areas with poor germination which as I mentioned was likely due to the age of the seed. I had topdressed with some additional organic potting mix, added more seed and another small layer of potting mix. I also switched to filtered water at that time.

As you can see it's filling in a bit but the grass has gone a bit limp and lost some of it's color.

Jonathan Green Dense Shade in a container


The growth seems to have stunted although some of the new seed is germinating and filling in the bare areas. Some of the older grass tips have browned. It looks like insect damage and I did see a couple of small critters on the grass which I squished. Not sure what they are or how they would have come inside. They were tiny flying bugs. I haven't seen any on the Black Beauty which claims to be naturally resistant to some insects.

Uhm... since I wrote that last paragraph I found out it's definitely bugs! I'm doing a time lapse recording of the growth and what I thought was some sort of video artifact is actually little tiny things crawling around. I sprayed some Organica K+Neem on them which seemed to work pretty well. K+Neem is no longer made but other products like Green Light Organic Neem Concentrate are still available.  Neem oil is a contact killer and doesn't have any residual effects. In a couple of days if I still see any I'll spray again.

Here's a portion of the video. You can clearly see the white bugs (larvae?) crawling around on the potting mix on the bottom right. In the middle of the video I sprayed the neem oil which put an end to them. The bugs are really tiny so you might need to watch the video in HD and fullscreen to notice them.


Black Beauty is supposed to be naturally insect resistant. I'm not sure if that's why nothing is crawling on that side or not?

After some research and having a closer look at one of the adult ones, it seems they were fungus gnats. Some more Googling and it seems other people have complained about gnats in Jungle Growth Organic potting mix. Don't know if they came in the mix, found they're way through a slightly damaged screen came in the door or hitched a ride on a pet. I'm going to keep a close eye on it. Have noticed a couple of gnats since I posted this but don't see the gnat larvae crawling around on the soil like before.

I'm hoping that the Dense Shade perks back up soon. The topdressing might have stressed it, the bugs surely did and while the neem oil shouldn't harm the grass too much could cause it problems.

Here's a top view.


It doesn't look as good compared to the Black Beauty on the bottom but when the Dense Shade was young it looked much better too. We'll see what happens in the next few days.

Jul 18, 2012

Two Great Garden Giveaways

Encap, the makers of the Fast Acting Lime which got a positive review from me a few years ago (because it helped green up my white grass!), is running 2 sweepstakes this year including 3 lawn makeovers and daily 3-in-1 Soil Meter giveaways. A couple other giveaways have already ended.

3-in-1 Soil Tester

Every day starting from June 1st through September this year one lucky winner will receive this 3-in-1 Soil Tester which measures soil moisture, soil pH and light. Entering is easy and there's no purchase necessary. Just find one of their products, scan the QR code with your phone, like them on Facebook and you're in! More details can be found here.

I have one of these and when I first got it I immediately opened it up stuck it in the soil (requires no batteries) switched it to pH and the needle didn't move. Turned it to moist and the needle moved a little but showed the moisture level was very low. The light seemed to work fine.

I was on my way to my uncle's place and took it with me. Checked his soil for moisture and the needle shot up to wet. Not a surprise he has an irrigation system and waters his lawn frequently. Clicked the switch to pH and saw the needle move as well. Aha! Soil must be moist to get a good pH reading!

When I got home I stuck the probes in my soil, watered the area and finally was able to get a pH reading but was it accurate? I have the Luster Leaf 1612 Rapitest pH Soil Tester that you pour soil into, pour the contents of a capsule, add water, shake and wait and tested the soil in a couple of spots using both the 3-in1 Soil Tester and the capsule tester. The readings were similar (these aren't exact digital readouts) but the 3-in-1 Soil Tester was much faster and easier to use. No digging up soil, fitting it in a little hole, messing with capsules, water and no wait! 

With one being given away each day there are plenty of chances to win.

Lawn Makeover Contest

Is your lawn so bad you think it needs a makeover? If so submit a photo of your troubled lawn to Encap's 2012 Lawn Makeover Contest, get your friends and family to vote for your lawn as the most troubled lawn and you might win one of 3 lawn makeover packages which include a variety of Encap lawn products as well as a $100 Home Depot gift certificate.

Jul 17, 2012

Black Beauty Day 4

Jonathan Green Black Beauty grass seed starting to germinate
I'm growing Jonathan Green Black Beauty grass seed in a container as a little experiment to get a better feel for it to see if it's a grass I'd like to plant when I do a lawn renovation.

It's been 4 days since I planted the Black Beauty grass seed in an organic potting mix.  I'm planting it in a container so I can better monitor and maintain it.

Yesterday I started to see signs that germination had started but today is the first I'm seeing little green shoots of grass emerging from the soil.

So far it looks like I'm getting pretty even coverage. 4 days is pretty quick for this type of grass to germinate but since it's sitting on my desk I'm able to closely monitor the soil moisture and add water when necessary.

One major difference I see compared to the germination of Dense Shade mix is that the blades of Black Beauty that are emerging are already leaning towards the sunlight coming through the windows. The Dense Shade on the other hand came straight up.

Close up of Jonathan Green Black Beauty seed germinating compared to Dense Shade
Black Beauty (left) Dense Shade (right)
One small section of the container is shaded by an obstruction and in that area the grass is coming straight up. I'm not sure if there's any significance to this observation but I wonder if the leaning grass shoots means Black Beauty wants more sunlight than Dense Shade?

Jul 14, 2012

Growing Grass Indoors: Day 17

Shade tolerant grass growing in an indoor container
It's day 17 of my project to grow grass indoors and it's been coming along nicely but not great. There were two main issues that were bugging me.

First, the level of the potting mix had fallen quite a bit after watering it a few days and I had wished that I added more potting mix to start out with. When I started my Jonathan Green Black Beauty experiment I made sure I had enough potting mix.

Second, while about 70% of the area had filled in nicely the other sections were very thin. This is most likely due my use of grass seed that about 3 years old. I tried using more grass seed to compensate but still got spotty results. Grass was still germinating, not all the varieties germinate at the same time, and those areas did have some new grass sprouting but I decided to ramp things up.

First I started by topdressing with about 1/4" of additional organic potting mix. I used my fingers to rake the potting mix down.

Then I added some more grass seed, concentrating mostly on the thin areas and topped it with about another 1/4" of organic potting mix.

Finally I watered it in but I've made some changes to my watering.

Instead of using water straight out of the tap and letting it warm up to room temperature I filled my spray bottle with filtered water from a Brita pitcher to cut down on the chlorine. Instead of using plain water I mixed in some Organica Plant Growth Activator Plus which contains a number of different beneficial soil bacteria and fungi as well as humic acid, seaweed extract, and some hydrolized soy meal.

The application of PGA+ was the reason I chose filtered water since the chlorine in my tap water kills the bacteria and fungi but I'm going to continue to use filtered water from now. Can't imagine the chlorine is good for the plants either.

The grass doesn't look as full as it did this morning because as careful as I tried to be, the top dressing did bury some of the blades of grass.

It's hard to tell in the photo because the color doesn't come through great in the photo but the color of the grass is starting to darken as well.

Jonathan Green Black Beauty Experiment

Jonathan Green Black Beauty Grass Seed
All the lawn geeks seem to use a blend of Kentucky Bluegrass to get a great looking, dark green lawn. At least that's what it seems like when reading different lawn sites and forums. I decided to check out Jonathan Green's Black Beauty Turf-Type Tall Fescue grass seed mix because I've heard some good things about it.

There are some people out there posting great lawn photos using other grass varieties besides KBG such as turf-type tall fescue (TTTF) and perennial ryegrass. I'm a bit weary of TTTF because there is some mixed into my lawn and it's thick bladed compared to my other grasses, grows faster and generally looks like a weed compared to my other grass.

From what I'm hearing though the new varieties of TTTF aren't as coarse and wide bladed as the old varieties of tall fescue and they're hard to distinguish from KBG. The tall fescue I have in my lawn is an older variety and possibly the K-31 I see so many complaining about.

Update: I was happy with how it looked so I wound up redoing my lawn and you can see pictures and info on my Black Beauty lawn.

Jul 13, 2012

How To Treat Lawn Disease Organically

picture of corn

Is Using Cornmeal to Treat Lawn Disease a Myth?

Not only does Dr. Linda Chalker-Scott consider the use of cornmeal as a fungicide a myth, an article from 2010 claims the myth is busted. Dr. Linda Chalker-Scott is the author of The Informed Gardener and numerous articles on horticultural myths

When I discovered Dr. Chalker-Scott's myth articles online a few years ago I read threw them all and found myself mostly agreeing with a lot of the content and was able to find corroborating work in other studies from what I remember. I even referenced her when I was asking myself... does SuperThrive work?

In this case however I find I can't agree with everything she says. Sadly, from the time I first started writing this piece, some of the links I originally quoted are now broken but I've tried to find similar research. The original article wasn't meant to be a rebuttal to Dr. Chalker-Scott but I tried to incorporate her opinions in the new version.

Note I actually started writing this article one or two springs ago which is why I have reference to all the rain. Right now it's the middle of summer and there hasn't been much if any rain but I'm leaving that verbage intact to illustrate what I was seeing at the time. I decided to finish it after seeing Dr. Chalker-Scott's article recently.

Jul 11, 2012

Fixing Break On Gilmour Spike Hose Connector

Gilmour sprinkler spike
One common complaint I've seen regarding the Gilmour Sprinkler on Metal Spike is that the hose connector breaks. Once it breaks you can no longer attach a hose which means you can't use the sprinkler.

I haven't had mine fail but I've come up with a solution that will reduce strain on this connection which will make it last longer. It will also make it easier to use the sprinkler.

Jul 8, 2012

Tools For Lawn Renovation

lawn spreader, pump sprayer, bow tine rake, thatch rake, shovels, hoes, wheelbarrow
I've been wanting to completely renovate and reseed my lawn for a long time and I think either this year or next year I finally will. While coming up with my lawn renovation plan I tried to come up with a list of tools that would be required to make the lawn renovation easier.

Lawn renovation doesn't require a lot of tools and I have most of them but there are a few that I will need to purchase.

Garden Sprayer

The first step in renovating a lawn is killing the existing grass and weeds. The easiest way to accomplish this is to use a glyphosate based herbicide like Roundup or one of the organic weed and grass killers. A pump sprayer is the best way to apply this herbicide because it gives control over the application rate and helps you prevent overspray. I had a nice Craftsman metal pump sprayer but I can't seem to find it anymore. I'm considering getting the Smith 2-Gallon Max Contractor Sprayer because it has very good reviews, is heavy duty and comes with a shoulder strap which will make it easy to use.

It's great that it comes with the shoulder strap because that allows you to have one hand free to carry a large piece of cardboard to shield other plants from overspray when you're killing the lawn around the edges.

If you have a larger area to cover you might want to consider a 4 Gallon Backpack Sprayer. You wear it on your back and there's a lever on one side that is used to add pressure to the system. Or you can use a small pump sprayer for the edges and an Ortho  Dial 'N Spray Hose-End Sprayer to cover the center area away from plants, trees and shrubs you don't want to harm.

These sprayers are useful to have to apply different amendments to your lawn throughout the year. Some of the organic amendments I use contain live bacteria and fungi and using a pump sprayer allows me to dechlorinate the water before spraying. Using the Dial 'N Spray chlorinated city water would mix with the amendment and greatly reduce the effects.

Leveling Rake

Have high and low spots in my lawn which causes me to have a bumpy lawn. This makes it a pain to mow. When I do my renovation I plan on evening out those areas. There are special rakes used to do this.

Professional landscape contractors use something like this Truper Tru Pro 36-Inch Aluminum Landscape Rake. It has a wide 36" rake head which makes it easy to level a large area.

Not as wide but I believe sturdier is this Ames True Temper Kodiak Forged Level Head Rake. The rake head is 14" wide which is nice for smaller areas. The head of the rake is one solid piece of forged steel which makes it more durable than some other rakes that are welded or riveted together.

If you're spreading compost a leveling rake will be more useful than a flexible leaf rake.

To use a leveling rake to level soil, use the tine side to loosen and distribute soil and then flip it over to the flat side to smooth out and properly grade the soil

Shovel, Spade, Mattock

A round point shovel is useful if you have to do any digging and to help move material such as topsoil, compost and mulch. I'm becoming more partial to Fiskars tools, their Long Handle Digging Shovel looks nice. I have an old wood handled shovel that works fine. If that ever goes I'll likely get the Fiskars.

A garden spade is a square tipped shovel that is also good for moving material and great for creating edges around beds and transplanting. It's also nice to have a long handled shovel as well as a D-handeled shovel. If you don't mind spending a little more the Ames True Temper Pony Garden Spade is one of the best garden spades I've seen. A good garden spade is something you'll wind up using often but if you want to save a little money Fiskars 9667 Garden Spade is a good second choice.

I used to use a garden spade along with a mattock/cultivator on a long handle to create the edges between lawn and garden beds but I'm considering getting a heavier mattock/pick combination like the Ames True Temper Pick Mattock with 36-Inch FiberPro Handle if I need to do any bigger digging.

Wheelbarrow

When I do my renovation I'm going to need a bit of topsoil to level out some areas and if I topdress with compost I'll need away to move that around too. I didn't realize wheelbarrows were so expensive. The cheapest one I found online was Ames True Temper 4 Cubic Foot Steel Homeowner Wheelbarrow. I saw some cheaper ones locally but I have concerns about the durability. This is a bulky tool that takes up a lot of space and I'll probably never need again I might rent one so I get something durable. Unfortunately I don't know anyone that I can borrow one from.

Spreader

Finally a spreader will be needed to spread the grass seed. I have an older Scotts Accugreen drop spreader because I don't have a huge lawn and have to deal with some odd angles. The new Scotts Drop Spreader doesn't seem to have many great reviews. If you have a larger area to cover the Scotts 76121 Turf Builder EdgeGuard Mini Broadcast Spreader was my second choice. A broadcast spreader spreads seed or fertilizer over a larger area than a drop spreader which makes things go quicker. The edge guard blocks the spray on one side so you don't get grass seeds in your garden beds or walkways.

Most homeowners will have all or at least most of the above products if they do any gardening themselves. If you don't, the cost of a lawn renovation can be quite high but all these tools are going to be useful in maintaining your landscape and a lot cheaper than hiring someone to do the work and maintaining your home's lawn and garden.